
In this drawing tutorial we’ll be learning how to draw an ant.
Did you know?
- There are more than 10,000 known ant species in the world.
- Ants are social insects which create colonies that vary in size from a couple a dozen to large colonies that can consist of millions of individuals.
- Ants can lift and carry more than 10 times their own body weight.
- Ants communicate with each other by using special chemicals called ‘pheromones’.

Level: intermediate
Tutorial steps: 6
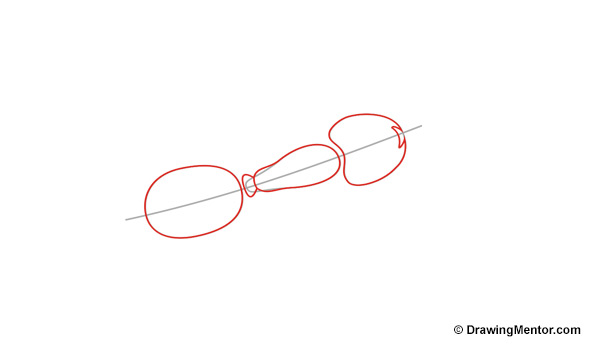
Step 1

Let’s start our drawing by creating slightly curved line on about a ten degree angle. Now we’ll draw three shapes. The first is an oval shape for the base of the body. The second is a smaller oval shape for the middle of the body which is squished down at one end. The third shape is for the head which is a tapered circle. See image above. It’s important to make sure the guide line passes through the middle of all the shapes.
Step 2
Now let’s refine the shape of the middle section adding the join to the base of the body and the middle torso. Then we’ll add the gap in the head where the mouth will go.
Step 3

It’s time to add the antennae to the head. We’ll draw two big eyes either side of the head. Note that the eyes are on the side of the head, not the front. Don’t forget to draw two lines for the small neck. Now add the middle torso leg sockets for the six legs we’ll add in later steps. It’s these smaller details that make your ant more realistic.
Step 4

Draw the first three legs on the left side of the body. The legs are made up of different sections. Take your time here using the image above as a guide. Once you’ve completed the legs, draw two lines on the base of the body.
Step 5

In this step we’ll draw the other three legs just as we did in the previous steps. See the image above as a guide.
Step 6

Now our ant is complete! Now you can use some shading to make him look 3D or perhaps he could be eating something. Have fun!


